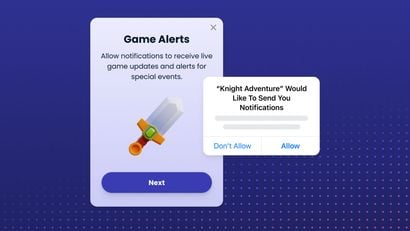
Web push notifications are a versatile channel that can be used to enhance your UX, re-engage users, promote new products or features, ignite engagement, drive revenue, and increase user retention. Compared to traditional channels such as email, web push notifications capture user's attention more quickly and can drive immediate engagement, which is ideal for time-sensitive content. The best part? You can add this powerful communication channel to your Next app for free.
In this guide, I'll show you how to integrate with OneSignal in order to add web push notifications to a React app built using the Next.js framework. This article is written with the assumption that you already know a little bit about Next.js — my focus will be on executing the OneSignal integration. In an effort to make this guide as useful to as many people as possible, I will start from scratch and cover the Next.js app setup process as well as the OneSignal integration and messaging process.
At the time this guide was written, I had the following dependencies installed on my system: macOS 11.3.1, Node v14.15.1, Yarn 1.22.10, Next.js v10.2.0 (latest at the time of writing). You should be able to follow along so long as you have Node version 14 or later.
Guide Overview
- Creating Your Next App
- Getting the OneSignal SDK
- Adding the OneSignal SDK Script to Your App
- Part 1: Initializing the OneSignal SDK
- Configuring Your Next App in OneSignal
- Part 2: Initializing the OneSignal SDK
- Sending & Receiving Notifications
- Additional Support & Helpful Resources
If you don't yet have a OneSignal account, create a free account before you begin this guide. Don't worry about configuring your account just yet — simply create your login and password and I'll walk you through the platform setup and initialization process later on in this guide.
Creating Your Next App
Execute yarn create next-app.
╭─iamwillshepherd@ares ~/code/onesignal-nextjs ‹main›
╰─$ yarn create next-app .
yarn create v1.22.10
[1/4] 🔍  Resolving packages...
[2/4] 🚚  Fetching packages...
[3/4] 🔗  Linking dependencies...
[4/4] 🔨  Building fresh packages...

success Installed "[email protected]" with binaries:
      - create-next-app
[##] 2/2Creating a new Next.js app in /Users/iamwillshepherd/code/onesignal-nextjs.

Installing react, react-dom, and next using yarn...
When the command completes, you should see console output similar to this:
Success! Created onesignal-nexgtjs at /Users/iamwillshepherd/code/onesignal-nextjs
Inside that directory, you can run several commands:

  yarn dev
    Starts the development server.

  yarn build
    Builds the app for production.

  yarn start
    Runs the built app in production mode.

We suggest that you begin by typing:

  cd /Users/iamwillshepherd/code/onesignal-nextjs
  yarn dev

✨  Done in 4.75s.
You can check out the excellent Next documentation to learn what this (☝🏾) command does.
Execute yarn dev to verify the app works as expected.
╭─iamwillshepherd@ares ~/code/onesignal-nextjs ‹main*›
╰─$ yarn dev
yarn run v1.22.10
$ next dev
ready - started server on 0.0.0.0:3000, url: http://localhost:3000
info  - Using webpack 5. Reason: no next.config.js https://nextjs.org/docs/messages/webpack5
event - compiled successfully
event - build page: /next/dist/pages/_error
wait  - compiling...
event - compiled successfully
Navigate to the URL returned in the output with your browser of choice.

Getting the OneSignal SDK
Our platform allows you to integrate with dozens of third parties. Because I'm integrating OneSignal into a React app, I must manually add the SDK service workers to the app. For instructions on how to do so, check out our Custom Code Setup Documentation. To get started, download the OneSignal SDK archive here.
Unzip the archive contents into your project into the public directory of your Next app. The OneSignal Web SDK directory contains service workers that do the heavy lifting of handling notifications. These service workers must be publicly accessible, so we use Next's static file servicing to achieve this.

Ignore the contents of public and __MACOSX. Move all JavaScript files from OneSignal-Web-SDK/ to public/.
╭─iamwillshepherd@ares ~/code/onesignal-nextjs/public ‹main*›
╰─$ mv OneSignal-Web-SDK-HTTPS-Integration-Files/*.js .
Confirm that the files have been moved and then remove the highlighted files.

Finally, cleanup the public directory.
╭─iamwillshepherd@ares ~/code/onesignal-nextjs/public ‹main*›
╰─$ rm -rf __MACOSX OneSignal-Web-*
Adding the OneSignal SDK Script to Your App
The OneSignal SDK script must be loaded to make use of the two service workers. Add the OneSignalSDK script under the Head component in pages/index.js.
Add the following script tag
<head>
  <title>OneSignal + Next.js</title>
  <meta
    name="description"
    content="Integrating OneSignal with a Next.js app."
  />
  <link rel="icon" href="/favicon.ico" />
  <script
    src="https://cdn.onesignal.mydomain.com/sdks/OneSignalSDK.js"
    async=""
  ></script>
</head>
At this point, you have completed the majority of the web app setup process. The last thing you need to do is initialize an OneSignalSDK instance
Configuring Your Next App in OneSignal
Custom code integrations require a bit of JavaScript code to initialize OneSignal. I'm going to focus on HTTP initialization because more people will be able to follow along. HTTPS initialization is very similar to what I'm covering here, so this guide will still be helpful to you.
OneSignal needs a unique key called appId to initialize the SDK. You can obtain this key by logging into your OneSignal account.
If this is the first time you've logged into your OneSignal account, you will be presented with a welcome page asking you to configure the platform. Create a new app for the Web platform named OneSignal Next.js by filling out the form and selecting Web as your platform.

If you've already configured your OneSignal for other apps, you can create a new app by selecting +New App from the apps drop-down menu in your dashboard, as shown below.

Once you've finished filling out the form, click Next: Configure Your Platform.
Under 1. Choose Integration, select the Custom Code option and fill out the remaining form fields in the 2. Site Setup section.

Note that I'm using http://localhost:3000 for my site URL because my dev server serves the site there. Once you're ready to deploy your site, you would change this URL to point to your domain. You'll also want to double-check that you enable the Local Testing option, allowing the integration to work in a development environment.
Lastly, click the Save to complete the application setup process.
The final page of the app creation process reveals appId in the second script. Copy the content of the second script.

Initializing the OneSignal SDK
Next.js uses React to render the app, so I have to handle the initialization of the SDK in a way that works with the framework. React provides a mechanism to perform side effects on page load: useEffect (read the doc to learn more). This hook allows code to execute when the page is mounted, which is necessary to init OneSignal.
useEffect(() => {
    window.OneSignal = window.OneSignal || [];
    OneSignal.push(function () {
        OneSignal.init({
            appId: "b40b7cc7-13dc-4662-8b48-efa668f9b72a",
            notifyButton: {
                enable: true,
            },

            allowLocalhostAsSecureOrigin: true,
        });
    });

    return () => {
        window.OneSignal = undefined;
    };
}, []); // <-- run this effect once on mount_app.jsReloading the app should reveal a new UI element (a circular red button with a bell at the center) at the bottom-right corner of the browser viewport.

Sending & Receiving Notifications
Now that you've finished the initialization process, you can create and send your first web push notification directly from your OneSignal dashboard. To test out this new messaging functionality, you'll first need to subscribe to receive notifications in your browser.
Subscribing to Notifications
Subscribe to notifications by clicking on the red button at the bottom right of your screen.

A dialogue box will appear at the top of your browser window asking you whether you would like to be shown notifications. Click Allow to subscribe.

To confirm your subscription, navigate to your OneSignal account and select the OneSignal Nextjs app. Click the Audience tab from the header menu to view subscribed users.

Select All Users from the sub-navigation menu to see a list of all subscribed users for this app.

At this point, you should be your only subscribed user 😅.
Building Your Message
Now that you have a subscriber, you can use OneSignal to push a web notification. To build a new messaging campaign, selecting Messages from the main navigation menu and click the blue + New Push button on the top right corner of the screen.

Fill out the form with your message content and message delivery preferences. You will see a preview of how your notification will look on the right side of your screen.

For testing purposes, our notification is configured to send immediately. The notification preview shows what the message will look like for a Mac user who has subscribed to the site using Chrome. Click the Web: macOS button located below the preview image to see how your notification will look on different platforms.

It's important to check the preview for all platforms before pushing a notification so that you can make any necessary formatting adjustments. Because this is a demo, I will push this notification even though the layout is broken for the Android web platform.
Sending Your Notification
When you are finished previewing your notification, click Confirm Message to review your selections and click Send Message to send it to your subscribers (a.k.a yourself).

You should see your notification appear on your desktop. If you entered a URL into the Launch URL form field of the message builder tool, then clicking on your notification should open a browser window with your designated URL destination. In my demo example, I entered the GitHub address for this integration guide.

Congratulations! You've successfully completed the Next.js and OneSignal integration process and sent your first web push notification.
Additional Support & Helpful Resources
To learn more about web push notifications and explore customization options, check out our Web Push SDK documentation.
If you are using web notifications in a creative way to improve your Next app UX, we want to hear about it! Tag us in a Tweet @onesignal to share your use cases.
Still have questions or want some help getting started? Email us at [email protected]. You can also join our developer community to share your feedback and access new features before they're released.
Join our Developer Community


